Tuesday, August 24, 2010

Week 5 Aug 23-28, 2010

Monday I continued with making the eccentric pins. I was determined to do them right this time and that's exactly what happened. I was a lot more careful in every step this time and it went well.

This is the plan for the pins.


I cut the slot on a 2.50mm piece of AP20 steel. Then after that I hardened and tempered the pieces to blue.


Then I turned the whole piece down to 0.76mm. I had to push the pins into a brass plate so they could be milled out. Once I had them milled out I wasn't able to pull the pins out of the brass plate so I ended up having to mill around the pin until there was barely any material left. Then I was able to wiggle them out.


I had to take a picture of the screen with the microscope to actually see the detail from the pins. Everything worked out and should be good to go in the watch. The only thing is that I am planning on flat polishing the screw heads so I will only be able to do that at the very end or they will end up being scratched.


Tuesday I set out trying to figure out my balance bridge and all the parts to go with it. I am trying to make it look a bit like this:


Of course it wouldn't be good to completely copy something so it will change a bit. The first thing I started making was the stud holder. I found some German silver so I made it out of that. I milled pretty much everything and will make the finishing by hand. Here is the design plan:


And here is how it looks after the milling from the top. It has to be thinned out on the back in a few places yet, so it's not quite done. But it looks a lot like the design. just an hour on the milling machine and voila!


After a bit of filing and smoothing here it is:


On Friday we had a visit to one of the few independent watchmaking companies left in Switzerland. The name of the company is Vianney Halter. They make only about 20 watches per year and the stuff they make is quite impressive. It was interesting to see how a small company works. The amount of machines they have for such a small company is awesome! Here's a nice view from the building:


The rest of the week I worked on making the balance bridge. This did not go as planned. I was trying to follow a lot of different dimensions and just wasn't thinking straight a few times. By the end of Saturday I had the basic shape milled out though.

Here is the design:


Next week I'll be trying to make the balance bridge functional. (Note: since I am posting this late on Tuesday, I'll tell you it didn't go so well on Monday. Had to remake the bridge again....)

Cya!


Sunday, August 22, 2010

Week 4 Aug. 16-21, 2010

Hello again. Here we go with week 4. Nice to know that some people are actually following this blog now. It makes posting new things feel a little more useful.

Anyways...

This week I started with turning the holes in the new bridges to 0.01mm smaller than the jewels. I did this by first centering the jewel I was working with on the M1. We have an attachment for it now that can be moved to the Schaublin lathe which makes things much easier. So after I had the jewel in the mainplate centered, I screwed the bridge onto the mainplate and turned the hole to the correct dimensions. It wasn't extremely difficult, but you have to be very precise. If the hole is too big the jewel will be too loose in the hole, and if the hole is too small the jewel can crack. I don't have any pictures but they would be pointless anyway, just jewels fit into the bridge. I'm sure you will see it in another photo later.

So then I set out making a new pallet fork bridge. The original one is quite ugly and had to be redesigned. I also decided to make locating pins on the bridge instead of on the mainplate like the original. I don't like the idea of being able to see locating pins.

It wasn't really easy designing something that went with the other bridges. The first design I came up with was kinda unique...


But there were some issues with this design. First of all it would've been extremely hard to bevel and polish. And secondly, when I put the balance bridge on it covered up the 'flames' or whatever you want to call them. So I just simplified it to this design:


So after making the shape how I wanted and screwing it on the plate, I had to turn the hole for the jewel like the other bridges. Unfortunately for me it was Monday and not my day. I had pre-drilled the hole for the jewel, but I wasn't thinking and drilled it too close to the final diameter. So when I went to center it on the bottom jewel it was way off. Like wayyyy off. So i had to make another bridge and pins. One of these days I'll start thinking things through better before proceeding. But for now I'll blame it on Monday.

Also because the bridge is in steel, the fit of the jewel has to be much more precise. Thankfully the school has many pivot gauges to help measure everything to pretty precise dimensions. The jewel fit great.

The next thing on the agenda was getting a nice new mainplate to do some actual official work. All of the other work on the mainplate is for trials and stuff. But now I have the actual mainplate so I need to be careful with it. The first thing to do was to plug all of the useless holes. Because I changed the design of the bridges, the screws and locating pins are all in different places so I needed to fill a lot of holes and also drill new ones. One other thing I wanted to do was get rid of the dial feet securing pins. The look horribly ugly and just not acceptable on my watch! I am planning on making a tapped hole from the side and a screw to hold the dial feet. And I will put it under a bridge so you can't see it.

So after drilling many new holes and plugging old ones, here is the result. There is still 4-5 holes that might get plugged, but I was not sure about them yet so I left them. Maybe I'll put a side by side picture of the new plate and the original to show how many holes are gone...

I also milled off the left part of the old pallet fork bridge, and milled off the part that said ETA 6498-1. Can't have that on my watch! Maybe I'll put AMS-01 on it haha....

Next thing I did was make the bronze bearings for the barrel arbor. The original design doesn't allow for any adjustment of endshakes. And if you went to school at WOSTEP you know that is just not acceptable. And the reason I am using bronze instead of jewels is because this is a lager watch with a big heavy barrel. So using bronze is just a bit more sturdy.


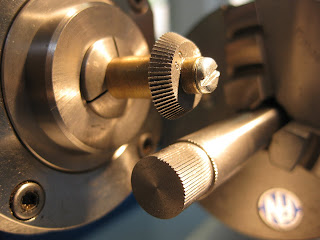
Parting off the bearing on the lathe


A pretty easy and quick process on the lathe. I will still have to turn the holes in the mainplate and bridge to fit the new larger bearings.

The last thing I worked on this week was banking pins. If you are like "Aaron, WTF are banking pins?" then I suggest you click this link. It is a Swiss lever escapement in motion. I hope you are able to see the two pins that the pallet fork rests on.

Since got rid of the old pallet fork bridge that had the banking pins on it, I have to make new ones. The are a munch of different types. I am trying to make eccentric screws for mine. They are only seen in high end watches. And after trying to make a couple I can see why. They are probably one of the smallest parts I will have to make and, although not overly complicated, very tough to make precise. The first one I made didn't quite work out but I think I have the process figured out so hopefully it goes well next time.

The other thing is that the head of the eccentric screw will be flat polished so I can only really do this at the very end and after most of the watch is already finished. So it might be an interesting journey to get these things to a) function properly, and b) not leave a mark on them before I put the watch in the case at the very end. Hmmm...

Just a pic of the screw head cutting.


And this is the tempering.


That's all for now. Not sure what the plan this week is. Might try to do some actual school work. But this stuff is quite enjoyable so we'll see...

Sunday, August 15, 2010

Week 3 Aug. 9-14, 2010

It was quite a busy week this week. We didn't have much for actual lessons so I was able to get a lot of things done. Just to give people an idea of what I am trying to make here is a picture of the bridge side.


And here is a picture of what I want the dial side to look like.


So the first thing I worked on this week was making the third and escape wheel bridges. These bridges were a little bit more difficult than the big one because I needed to put the locating pins and screw hole in first so it they would stay in place for the milling.

Here's the escape wheel bridge with the pins in and screwed to the mainplate.

Just milling part of the bridge and the outline of the rest on the top


Here it is with the two sides milled and the rest is just an outline on the top.


That's why I made it thicker than the final dimensions so I could mill the shape on top to aid in the filing.


And after much filing here are all the bridges on. Final dimensions will come later but for now I think it is a good start. I still probably have to make a new balance bridge but I'll worry about that later...


Next I had to center each hole on the jewels on the mainplate. Then I milled out the holes to 0.20mm smaller than the final dimension. These holes are just so I had something to center on to mill out the underside of each bridge. These cut outs are to make room for the actual wheels.

Here are the bridges with the underside cut out to make space for the wheels. It took me about 4-5 hours to do all the re-centering and milling.


Here are all the pieces from the underside. You can see the locating pins sticking out. Two for each bridge.

I actually kinda milled out a bit too much around the center jewel, but I don't think it will be a problem. My mainplate will get a few hundredths thinner when I have to retouch it anyways.


The other thing I was doing this week was making the moon phase wheel. If you have talked with me about watches a lot you will notice I really like the moon phase complication. I just think it looks nice. Not the most complicated or useful thing but whatever, I like it! I could've just used a wheel from another watch somewhere but I thought it would cool to try and make one of my own and decorate it the way I see fit.

There are 59 teeth on the wheel. This is because the length of a moon phase is 29.53 days. Therefore to make the system more accurate we put 59 teeth on the wheel and make it jump 1 tooth per day. That is also why there are 2 moons on the disc.

Now to say the process of making this wheel was not easy/fun is a large understatement. Just to cut the teeth took about 8 hours. The reason for this is I had to cut each tooth in steps. Each one is 0.34mm deep and you can't just cut all the way in at once. I was cutting about 0.03-0.04mm per pass so that is about 9-10 passes per tooth. Times that by 59 and you get about 550-600 times back and forth. And you can only cut in one direction so I would have to go in, cut across, lift up, return to the start, and go in deeper.

On top of this there is a spacer wheel which divides the turning of the piece into 59 divisions. That's all good but you have to make sure you don't turn it 1 too many or too less holes or the whole wheel will be ruined. It was a lot of concentration for a full day. But it felt great when I was done!

All of this wouldn't be possible without my buddy Schaublin!


And here are the wheels I got from all that work. The one is a little blue because I heated it up a bit too much when I was ungluing it from the brass. But it won't make a difference once I harden and temper it.

The other thing with the holes is the container I made to hold the wheel when I have to harden the steel. I needed to make something to sandwich the wheel in there so it won't warp when it gets really hot. The holes are allow oil in to quench the steel and cool it down. Hopefully it all works out!

One other thing I did this week was mill out the location for the new hour/minute positions and the intermediate wheel. But everything looks like it will work out so far. I probably have to make another wheel that will only rotates once a day for the moon phase wheel, but that's a later project. I also need to figure out the power reserve system but I have a plan for that so I just have to figure out the details.


This week I will be enlarging the holes in the bridges for the jewels. Once I do this I can actually get the watch running again! It will be cool to have it running with the new bridges.

Here is one last pic this week. It kinda shows on the mainplate all the holes I might be have to plug. There are a lot of useless holes on the mainplate and I don't want any of them to be visible from the bridge side. Not very complicated to fill, just a lot of them!!


Bye for now!

Tuesday, August 10, 2010

Week 2 August 2-7, 2010

This last week I started working on the bridges for the watch. I designed 3 bridges of which I will make from scratch. Hopefully I will use the stock barrel bridge but not quite sure about the balance bridge. I think I will end up making a new one since the stock one is a bit lower than the other bridges and probably won't work out, but I'll deal with that later.

First thing I did was mill out the new shape for the barrel bridge. This wasn't very difficult or time consuming. I just found the correct radius and milled it on the M1.

The next bridge I decided to do was the 3rd and center wheel bridge. It is the biggest so I thought it would be good to get out of the way first. I spent the first day trying to figure out how to actually go about making it. I ended up having to plug 2 holes on the mainplate so that I could make new ones in the spots I wanted. after that I glued a flattened piece of brass onto the mainplate and located where I needed to put the new screw holes and locating pins. Then I drilled the holes and tapped the screw holes.

Here you can see the rough piece after the screw head sink holes were done. The bridge is still way too high but this allows lots of room for milling the rough shape on top.

Now that I had the 2 screw holes in the correct spots, I could just screw the bridge on to do the rough milling. I didn't put the locating pins in at this point because this bridge had two screws and didn't need them.

Here I am just milling out one of the sides on the M1. Because of the shape of the bridge I couldn't mill everything out on here so I had to mill a rough image of the final dimensions. This made it much easier to file the rest of the bridge out by hand.


Here is the bridge design I made. I think it looks pretty cool! Just for a reference, this is the original bridge design so you can see how much different it will be. You can see I only milled the two right hand edges. The rest I just milled on top so I would have a guide for filing. The reason I didn't mill it out was cause the milling cutter likes to catch sometimes if you don't control it properly and I didn't want to risk it slipping and ruining the whole bridge.

I had also milled the shape for the balance bridge (even if I don't use it). It was a quick job so not a big deal.


Above is the start of the filing process. Had to do a LOT of filing! I basically spent all of Friday (about 7 hours) filing this part to the shape I designed. Filing isn't the most fun activity but it's nice to see something actually taking shape!


So after many hours of filing I was pretty close. The dimensions aren't exact or anything yet. After that I milled the top down to about the same height as the original bridges. I still have to mill out the recesses for the wheels underneath. Then after that I will have to make the holes for the jewels.

Here is the piece being milled on the top:


After getting the top milled out I made some pins out of german silver to push into the underside of the bridge for locating pins. These pins and their location are very important because it will ensure the bridge is always screwed down to the same position every time. This maybe has more importance on a bridge with only 1 screw, but it still makes a difference on any bridge. So after all of that, here is the bridge on the mainplate with the other 2 bridges I finished, looks pretty good so far I think!


And this is the cluster-cuss that is my bench when working on this project! Not easy to keep clean when you are using so many tools at once....


See ya next week!

Sunday, August 8, 2010

Week 1 July 26-30, 2010

The first week was not a full week. I was technically still on holidays so I didn't come in every day or stay very long. It's not easy getting started on a project this big when there are many unanswered questions about what I am going to be doing at each step. So I figured I would just start by refinishing a few parts. All of the parts are from the setting/winding mechanism. These parts are just chrome plated on the original watch which just looks plain ugly. On the flip side of that, the finish on these parts has absolutely no impact on the look of the watch because all of these parts will be hidden under the dial. Nonetheless this is a part of fine watchmaking and is important.

All of the parts on the left are the originals, and the refinished ones on the right. Hopefully you can see that the ones on the right are much nicer. The are straight grained and the edges are beveled and polished by hand using files and special paper.


The part with the pins was the most difficult. There was no way to make the straight graining without first cutting off the pin. Then I had to drill a new hole in the same place the old one was. Next I had to make a new pin. The diameter of this pin is 0.50mm and the length is 1.00mm. I then had to make the nice straight graining on the top of the piece and also bevel and polish the edges. Then the last step was to push the new pin in place. The pin was 0.02mm bigger than the hole so that it is friction fitted and will hold when pushed in. I also had to be careful not to touch the finish or the piece would be ruined. The whole process took about 3-4 hours.

Unfortunately for me I had to do it twice because I used the wrong piece! There is also a mirrored version of the 6498 called the 6497. Basically all of the setting/winding mechanism parts are the exact opposite. So I was dumb and didn't check which one I was using. But on the plus side, the same part will be used in the WOSTEP school watch so it wasn't a total waste as I can use it in that watch.

So that was the first week.

Back to Basics

Well I have pretty much neglected the blog full for the last 4 months or so. Nothing really worth talking about and well blogging is tedious and non-rewarding. But now that I have actually started to work on making a watch at WOSTEP, I suppose I should document it. So this will be the start of that. The blog will only be about that. I will make an honest attempt at updating once a week about the stuff I was able to do the past week. I started two weeks ago so this will be a double update. Here it goes.

Brief Background

The students at WOSTEP in Neuchatel are given the chance to make their own watch. None of the other WOSTEP schools in the past have had the opportunity to do this. However the school is trying to change this. This year the school decided to have their own custom designed "WOSTEP caliber W-01" The watches in the past were a pocket watch design and this one is no different. It is 40mm in diameter and very similar to the Unitas 6497. In fact it is pretty much the exact same watch but with a larger diameter and made with better materials and having a nicer finish.

Since the school decided to do this, we were also told that we would be limited in the freedom of customization to be done to the watch. This, along with the fact that I think pocket watches are dumb and completely useless led me to the decision to attempt to make another watch of which I would do whatever customizing I felt I could do. It will be a wristwatch and the movement is the base Unitas 6498-1 watch. This is what the watch looks like new. Of course there is a major time confliction considering we still have to do the WOSTEP school watch, along with actually learning watchmaking, and also doing another internship in January. Needless to say I will be putting in an extreme amount of hours to get all of these things done. But I think having a wristwatch I can actually wear and show to people will be much more rewarding than a pocket watch which will for surely collect dust in a box (no matter how nice I do make that one as well!) So with that said, the next posts are the first 2 weeks! I'll try to answer any questions about the stuff I'm doing...